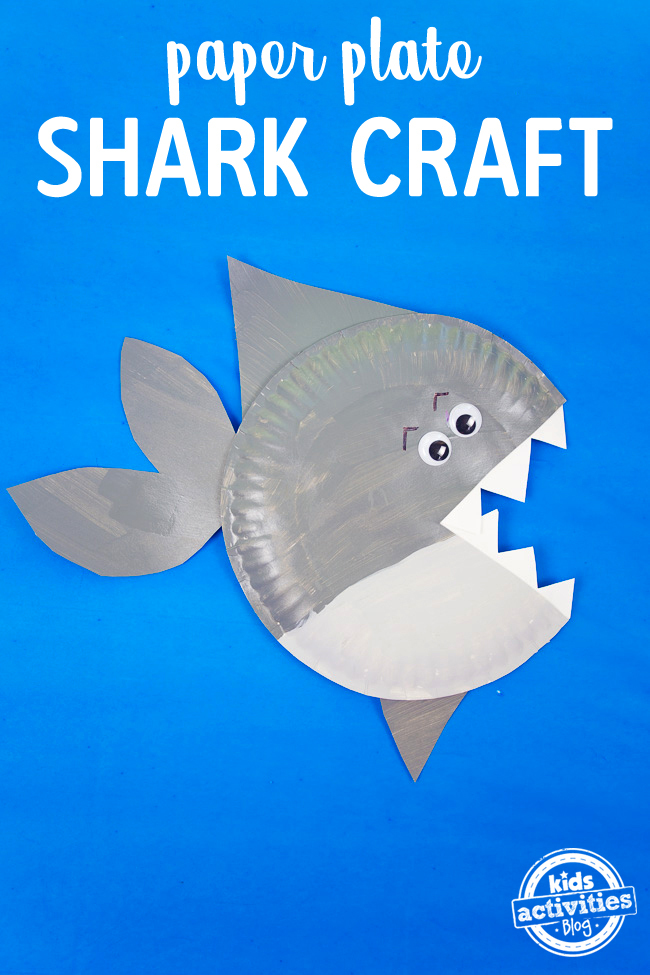
Let’s make a paper plate shark craft for kids of all ages. Grab a few supplies like paper plates, paint, scissors and googly eyes! This simple shark craft is sure to get everyone smiling.
This shark paper plate craft is perfect as a Shark Week craft. Kids can customize the shark however they’d like, adding fun decorations to make their own unique creation.

Sometimes you just need a very simple craft idea. This paper plate shark craft is just that. Easy is better and this shark craft for kids turns out really adorable.
This article contains affiliate links.
Shark Paper Plate Craft
Supplies Needed
- Three white paper plates
- Paint (we used light grey and dark grey)
- Googly eyes
- Glue
- Scissors
Directions
Step 1
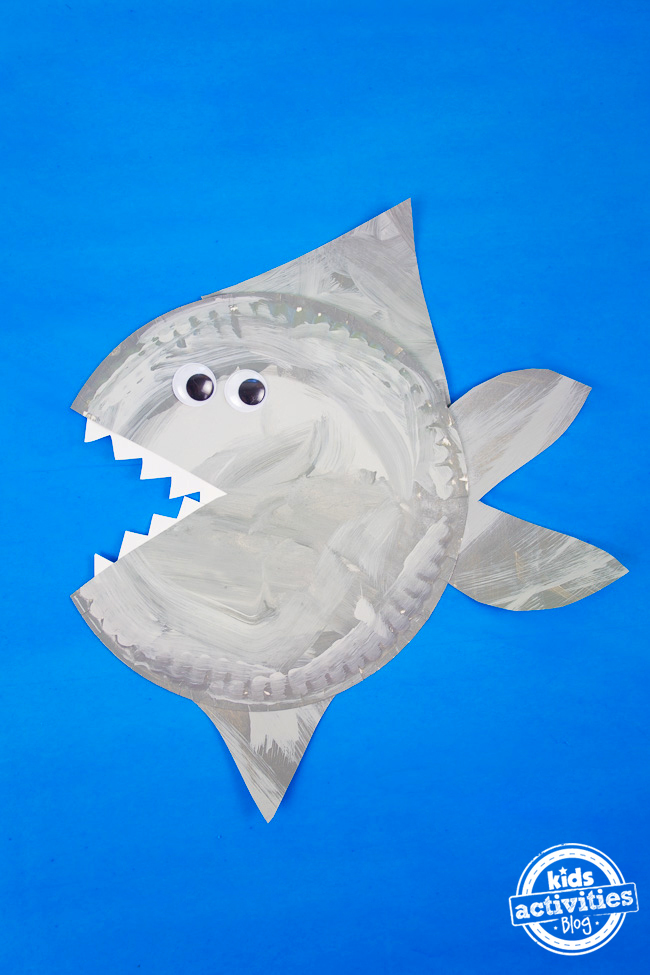
Paint two of the plates using the grey paint — one will be the body of the shark, and the other will be used to create its fins.
My son wanted his shark to have more of a marbled look, so he combined the light grey and dark grey paint. I painted the top of my shark with dark grey and added a light grey belly.
Step 2
Once the paint is dry, cut a small triangle into the body of the shark to create its mouth.
Cut the shape of the tail fin and the top and bottom fins from the other plate. You can use part of the third plate if necessary, you’ll just have to paint it, too.
Cut two sets of teeth from the remaining plate. These will stay white.
Step 3
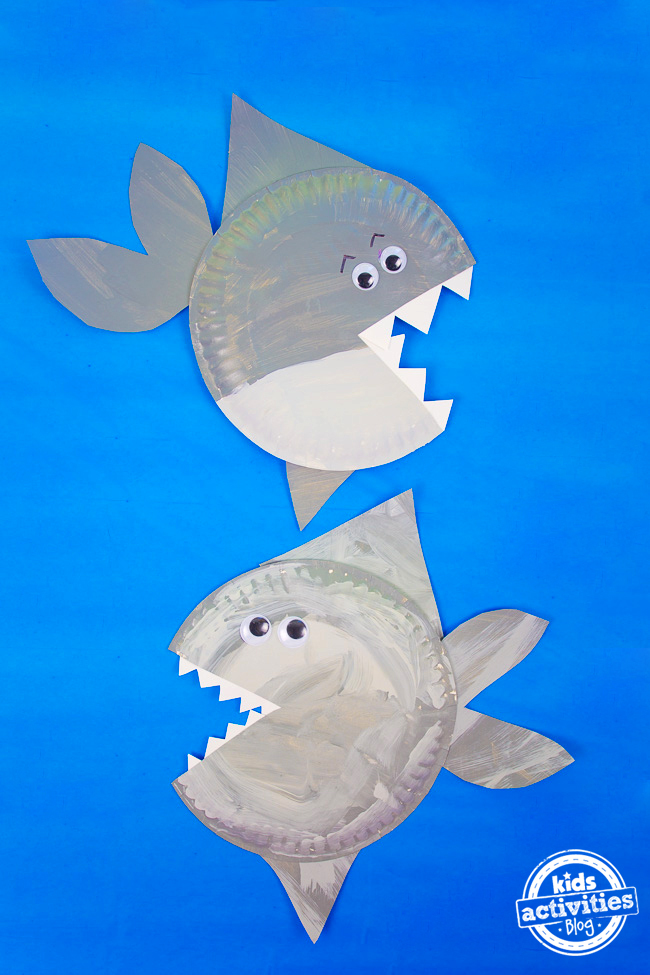
Glue the fins into place and add the googly eyes — now you have a shark!
{“@context”:”http:\/\/schema.org”,”@type”:”HowTo”,”name”:”Paper Plate Shark”,”author”:{“@type”:”Person”,”name”:”arena”},”datePublished”:”2021-07-11″,”yield”:”1″,”description”:”This very simple shark craft is perfect for kids of all ages. It uses just a handful of supplies and can be customized for any shark ideas your child might have. Let's make a paper plate shark!”,”about”:”craft”,”image”:[“https:\/\/kidsactivitiesblog.com\/wp-content\/uploads\/2017\/07\/Paper-Plate-Shark-2-200×200.jpg”,”https:\/\/kidsactivitiesblog.com\/wp-content\/uploads\/2017\/07\/Paper-Plate-Shark-2-320×240.jpg”,”https:\/\/kidsactivitiesblog.com\/wp-content\/uploads\/2017\/07\/Paper-Plate-Shark-2-480×270.jpg”,”https:\/\/kidsactivitiesblog.com\/wp-content\/uploads\/2017\/07\/Paper-Plate-Shark-2.jpg”],”performTime”:”PT10M”,”totalTime”:”PT10M”,”tool”:[“glue “,”scissors”,”(optional) permanent marker”],”supply”:[“3 white paper plates”,”gray paint”,”googly eyes”],”step”:[{“@type”:”HowToStep”,”text”:”Paint two paper plates gray – one will be the body of the shark and the other will be used to cut out the fins.”,”position”:1,”name”:”Paint two paper plates gray – one will…”,”url”:”https:\/\/kidsactivitiesblog.com\/110819\/shark-paper-plate-craft\/#mv_create_337_1″},{“@type”:”HowToStep”,”text”:”Once the paint is dry, cut out the mouth area from the shark body paper plate.”,”position”:2,”name”:”Once the paint is dry, cut out the…”,”url”:”https:\/\/kidsactivitiesblog.com\/110819\/shark-paper-plate-craft\/#mv_create_337_2″},{“@type”:”HowToStep”,”text”:”From the other paper plate, cut out fins and a tail.”,”position”:3,”name”:”From the other paper plate, cut out fins…”,”url”:”https:\/\/kidsactivitiesblog.com\/110819\/shark-paper-plate-craft\/#mv_create_337_3″},{“@type”:”HowToStep”,”text”:”Use the third paper plate that is still white to cut out the teeth.”,”position”:4,”name”:”Use the third paper plate that is still…”,”url”:”https:\/\/kidsactivitiesblog.com\/110819\/shark-paper-plate-craft\/#mv_create_337_4″},{“@type”:”HowToStep”,”text”:”Glue it all together”,”position”:5,”name”:”Glue it all together”,”url”:”https:\/\/kidsactivitiesblog.com\/110819\/shark-paper-plate-craft\/#mv_create_337_5″},{“@type”:”HowToStep”,”text”:”Add googly eyes and (optional) shark eyebrows with a sharpie.”,”position”:6,”name”:”Add googly eyes and (optional) shark eyebrows with…”,”url”:”https:\/\/kidsactivitiesblog.com\/110819\/shark-paper-plate-craft\/#mv_create_337_6″}],”url”:”https:\/\/kidsactivitiesblog.com\/110819\/shark-paper-plate-craft\/”}
Yield: 1
Paper Plate Shark
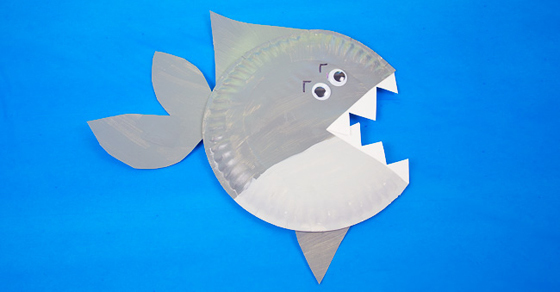
This very simple shark craft is perfect for kids of all ages. It uses just a handful of supplies and can be customized for any shark ideas your child might have. Let's make a paper plate shark!
Active Time
10 minutes
Total Time
10 minutes
Difficulty
easy
Estimated Cost
$0
Materials
- 3 white paper plates
- gray paint
- googly eyes
Tools
- glue
- scissors
- (optional) permanent marker
Instructions
- Paint two paper plates gray – one will be the body of the shark and the other will be used to cut out the fins.
- Once the paint is dry, cut out the mouth area from the shark body paper plate.
- From the other paper plate, cut out fins and a tail.
- Use the third paper plate that is still white to cut out the teeth.
- Glue it all together
- Add googly eyes and (optional) shark eyebrows with a sharpie.
We just love how these turned out! Make sure to tune in to the Quirky Momma Facebook page this week, where we’ll be sharing Shark Week ideas for kids all week long!
MORE SHARK FUN FROM KIDS ACTIVITIES BLOG
- All things shark week can be found right here at Kids Activities Blog!
- We have over 67 shark crafts for kids…so many fun shark themed crafts to make!
- Learn how to draw a shark with this printable tutorial with step by step instructions.
- Need another printable shark template?
- Make an origami shark.
- Craft this homemade hammerhead shark magnet with free printable template.
- Make this super cute shark paper plate craft.
How did your paper plate shark craft turn out?

